
Update 2024:
Monkey Detector app based on TensorFlow Lite now available here: https://circusscientist.com/MonkeyDetector2.apk which is:
- More Stable
- Open Source
*Coming soon: optional ESP-CAM addon for monkey detection and auto-squirt..*
UPDATE 2023
New version! Stand-alone using a car windscreen squirter and PIR motion sensor. Easier to use – no camera required
I used a 12v->5v converter to power the D1 mini from the 12v battery, and put everything inside a large tupperware (mounting the squirt nozzles on top).
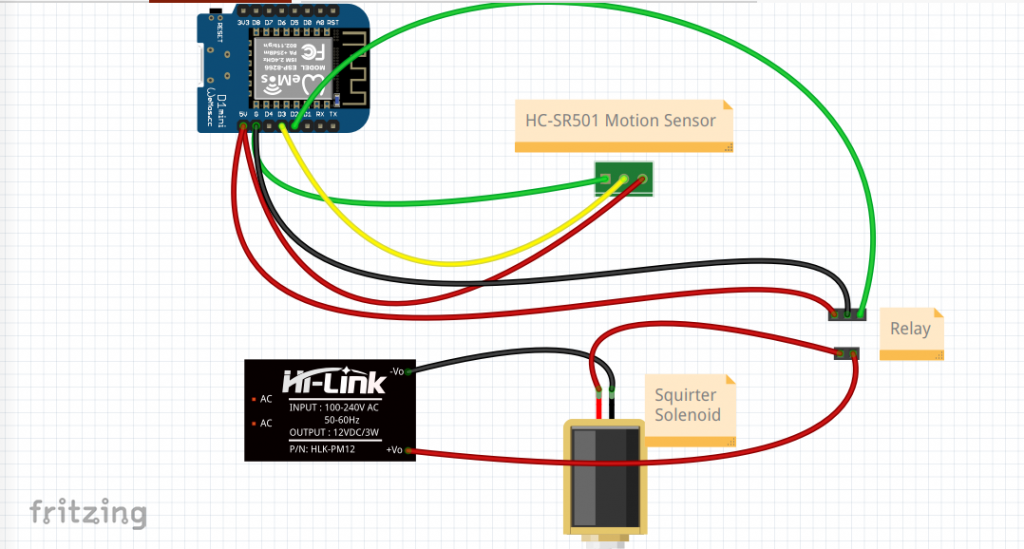
Updated with PIR sensor code: D1 mini firmware to switch the relay
The new version does not require an Android app, just open the ip address you set in the code and use the web app to squirt, or arm the motion sensor to do it for you!
VIDEO:
(Instagram: https://www.instagram.com/p/C4YjtFgNLhw/)
OLD VERSION BELOW:
What do you need for this project?
Software:
Hardware:
Affiliate links are included on this website. Please support my future projects! Another way to support my work, and help yourself to free stuff at the same time, is to check out DigitalOcean with their promotional 2 months free hosting. If you haven’t yet heard of them, they are the best and cheapest virtual server on the market right now, use the link!
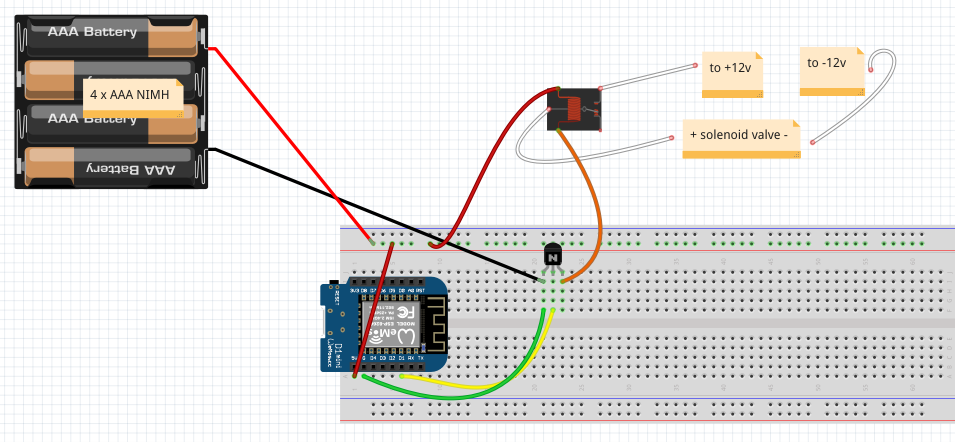
I was hoping to power the whole thing from 12 volts but the voltage regulator was getting a bit hot, and my main directive for this whole project is to use what I’ve got (otherwise I would have a relay shield like this one instead of the bare 5v relay which I had to trigger with a transistor).
- Breadboard http://s.click.aliexpress.com/e/KdMqDwrA
- D1 Mini: http://s.click.aliexpress.com/e/4Tb1vTn6
- D1 mini relay: https://s.click.aliexpress.com/e/_s05zgs OR:
- Relay: https://s.click.aliexpress.com/e/_sbpC45 OR:
- you can buy the relays in bulk really cheaply here: https://s.click.aliexpress.com/e/_sBPnJB
- More relays but 3v ones (if you use these just take out the transistor in my circuit): https://s.click.aliexpress.com/e/_shriep
- Solenoid valve like this: https://s.click.aliexpress.com/e/_s5P3Hj
Test out the breadboard:
Instructions for editing and uploading D1 mini code are on the first part of this series: https://www.circusscientist.com/monkey-detector-part-1:-detect-a-stuffed-toy-and-switch-on-an-led. The code is the same, it’s just a WiFi switch after all. This time we are switching a relay instead of an LED.
Now visit the IP address of the D1 Mini in your browser:

You should hear a click from the Relay when you select ON (Socket #1) – and if you have connected the Solenoid Valve to 12v you will hear a louder click from that. The circuit works!
Trigger from the Android App:
Edit the Monkey Detector Android App, changing IP address to the one of your D1 Mini, like we did in the Teddy Bear Detector, but this time we will not change the detected object. We want to detect monkeys. While you are waiting for this to compile, check out the version on the Google Play Store – and the related project I made, Pet Detector!
Finished
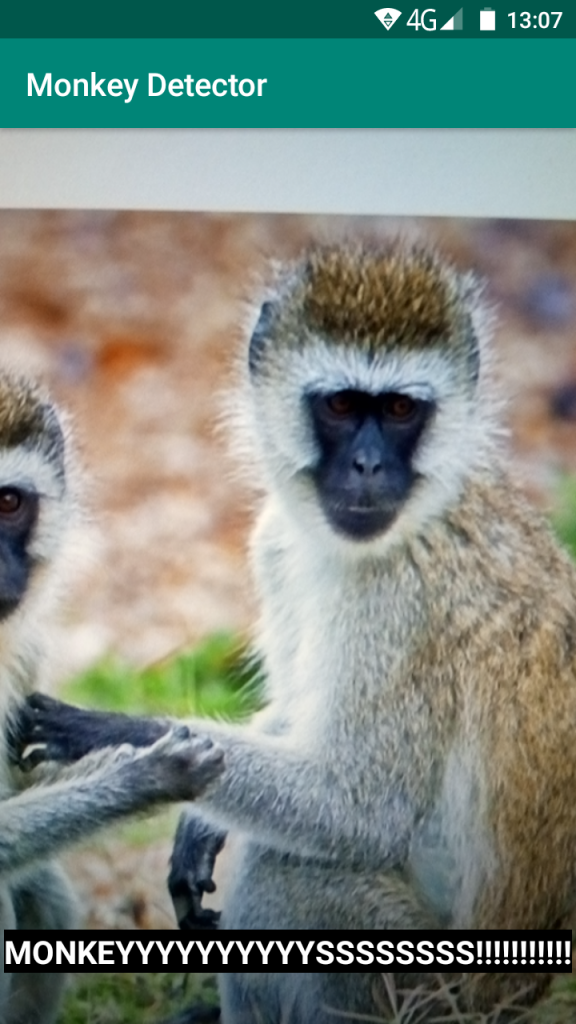
Point the phone camera at a monkey (monkey pics work fine) and you will hear an alert sound, as well as the relay and Solenoid Valve clicking open. Now all that’s left to do is to solder everything together inside a nice box with wires coming out and attach this to the sprinkler tap. No more monkey problem.