
What you will need for the project:
- ESP12e dev board:
Aliexpress: http://s.click.aliexpress.com/e/EOP1yvis
– ESP8266 development board, with battery pack and pre-soldered headers. This one comes with RGB LED, and even a light sensor. Buy two if you like! This project can easily be adapted for any ESP8266 board, such as my favorite D1 Mini. I am using this one here because there is no soldering needed, and it comes with a battery pack. - Arduino Uno: Aliexpress: http://s.click.aliexpress.com/e/O3ReneKM – this is the one with the removable Atmega328P chip, used for programming the ESP8266 dev board.
- USB cable for the Uno:
Aliexpress: http://s.click.aliexpress.com/e/DbdRP69S - Jumper cables to connect everything – no soldering for this project!
Aliexpress: http://s.click.aliexpress.com/e/LYGLYsxA
– a selection of male to male/female etc. We are using M2M for the Uno to LED Strip connection - WS2812 LED Strip:
Aliexpress: http://s.click.aliexpress.com/e/BCKods5w
– Choose your version. I chose 5m, 150 LED’s, IP30 (not waterproof) and white PCB - AA batteries x 3
*please note: I can not be held responsible for any melted micro-controllers or LED strip. The following project worked for me, that’s as much as I can say, however I wouldn’t necessarily leave it running when I leave the house. It is recommended on many Arduino forums to have at least a 1000 uF capacitor between 5v and GND (before the LED strip) and also a 500 Ohm resistor before the Data line. Please see https://learn.adafruit.com/adafruit-neopixel-uberguide/powering-neopixels for some more tips.
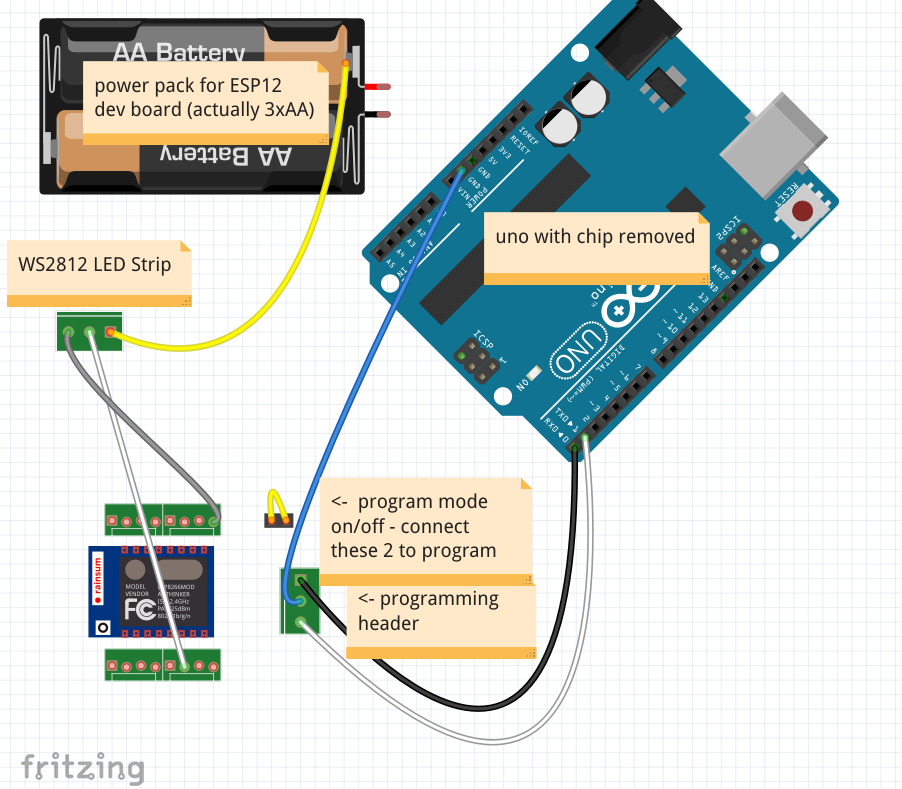
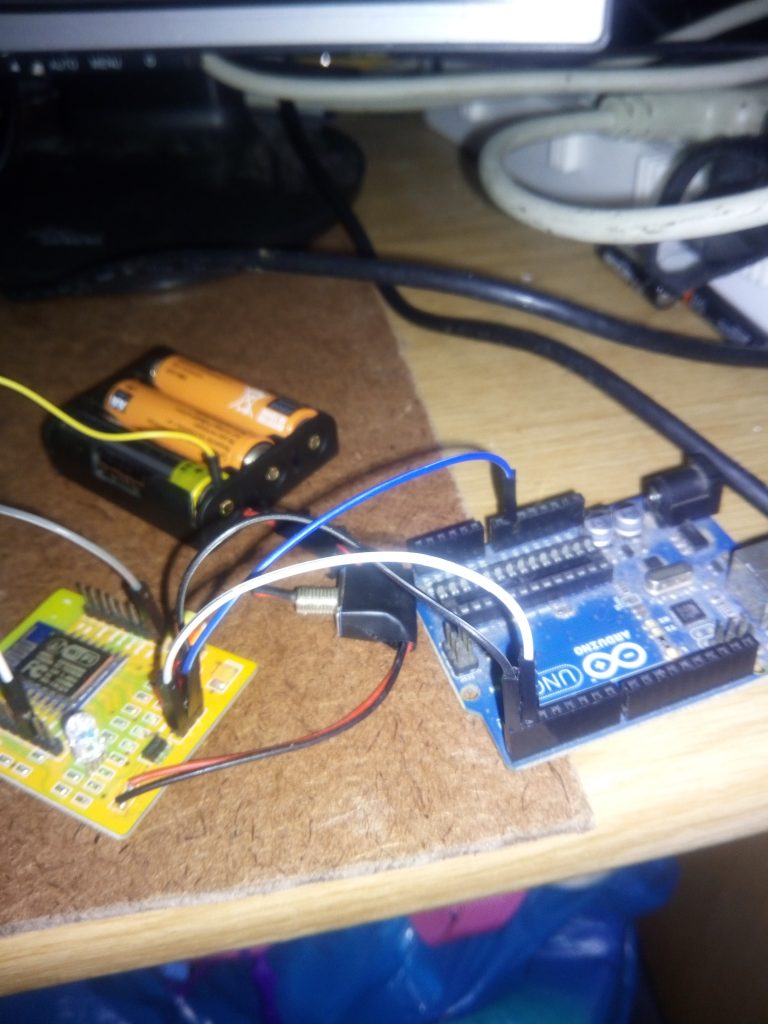
THE CIRCUIT:
PROGRAMMING:
Get your Arduino code here: https://github.com/tomjuggler/esp8266-fastled-webserver – this code is not mine, I have just adapted it to work out of the box for my LED strip, and also stand alone by default without the need for a router.
If you haven’t done so already, get the ESP8266 addon for Arduino IDE. The addon and instructions are here: https://github.com/esp8266/Arduino
- Make sure everything is connected (except for the LED Strip power line (yellow wire), the 2 programming mode pins need to be shorted together before power on. The board comes with a little cap thing to do this.
- Power on the board (I added a switch to mine, it doesn’t come with one, you can just pull one battery and put it back to power on.)
- Plug in the USB cable from the Arduino to your computer – the Arduino Uno’s Atmega328 chip needs to be removed first (you could also use a USB to Serial adapter to program instead).
- Select ‘Generic ESP8266 Module’ as your board, in the Arduino IDE. Also choose 4m with 1m Spiffs. Check your Serial connection now, Tools -> Port.
- Upload sketch
- Switch board off and on again (with programming mode pins still shorted)
- Upload Spiffs (files needed for web server etc), Tools -> ‘ESP8266 Sketch Data Upload’
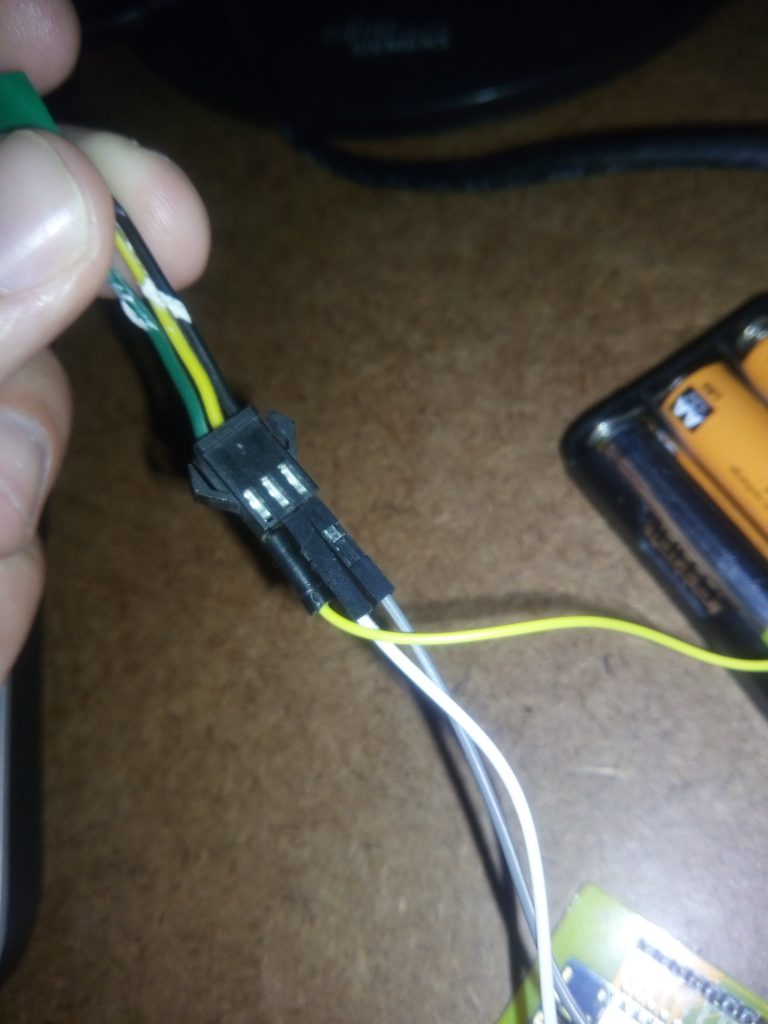
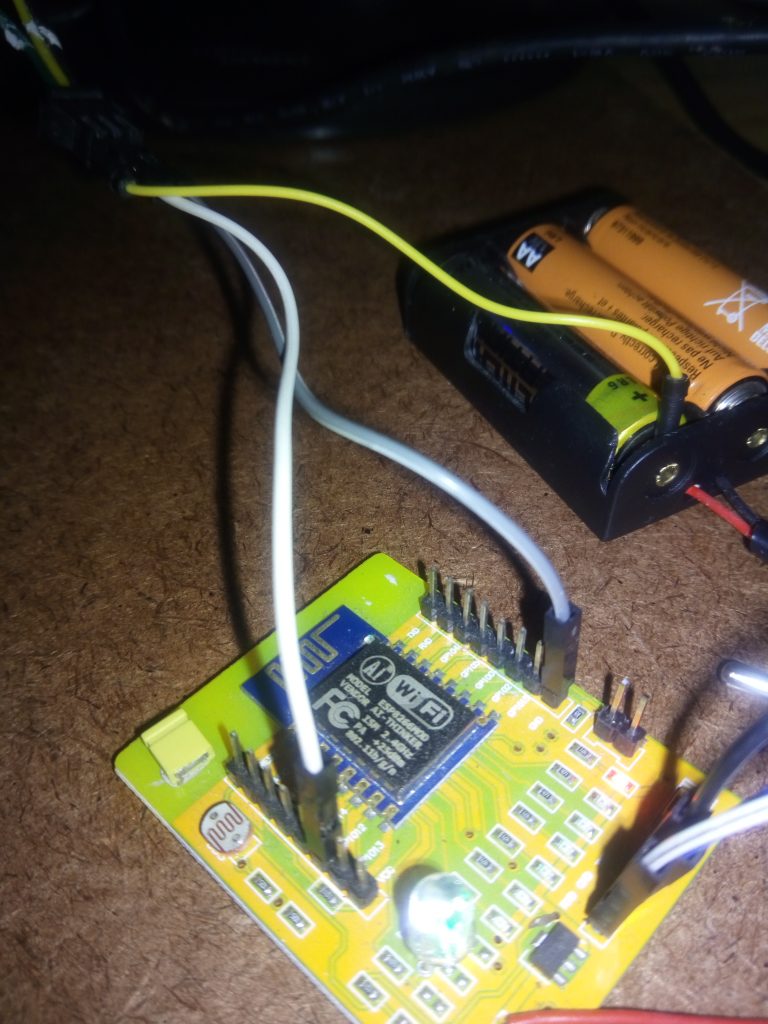
- Disconnect the 2 programming mode pins, connect the yellow LED Strip 5v wire to 5v (I wedged mine in between the + battery terminal and battery, see the photo below)
- Power on
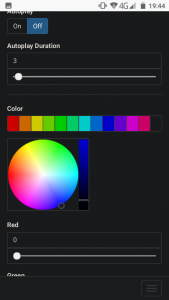
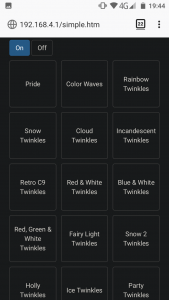
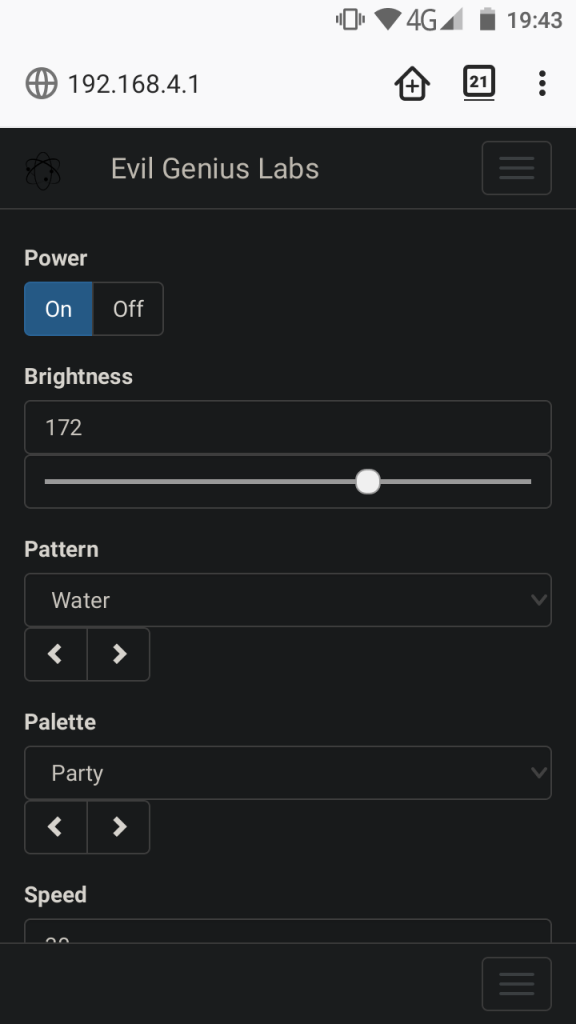
- Now you need to connect to the WiFi Access Point, using PC or Mobile Phone. The AP should show up as ESP – something or other. Once connected, type ‘192.168.4.1’ into the address bar. This is the ESP8266 default web server address.
- That’s it, you should be able to use the web app to control your lights!
Here are a couple more pics of the connections:

Once the code is loaded you should be able to disconnect the programming wires and Arduino UNO. Now just hang your lights around the window (I hung mine around the top edges, behind a net curtain which gives a great effect). Also, maybe put the board and batteries in a box for neatness, or even replace the battery pack with a power supply (I may do this myself later).
POSTSCRIPT:
What I find most fascinating about this project is the amount of inter-working pieces here. The ESP chip is programmed in C, which is interfacing with JavaScript served up by an internal web server, and run in the browser. HTML is also involved – have a look inside the data folder of the Arduino sketch yourself if you are interested. It’s a great learning program with some really festive settings for the lights, and I’m grateful to Jason Coon for sharing it on GitHub.
MERRY CHRISTMAS EVERYBODY!