
The problem: Trying to make software defined patterns that look good on my diy POV POI, but programming and spinning poi are two mutually incompatible activities.
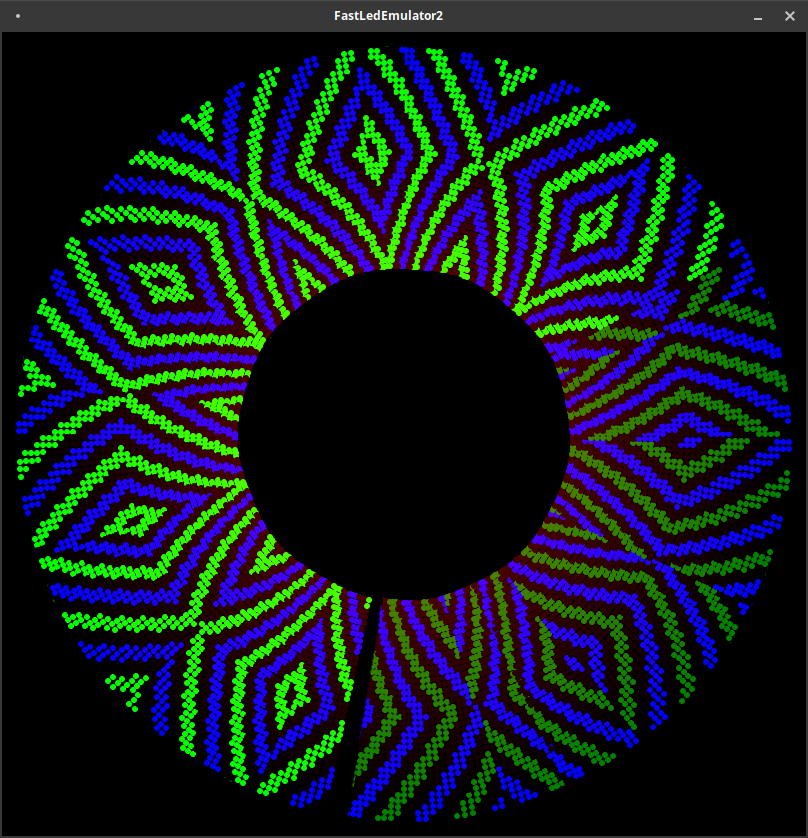
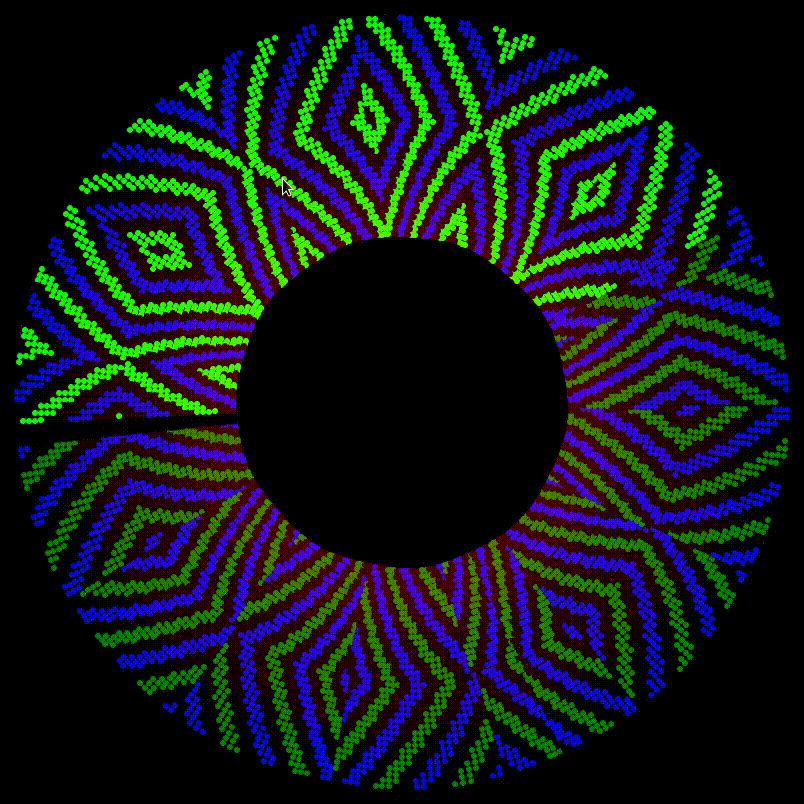
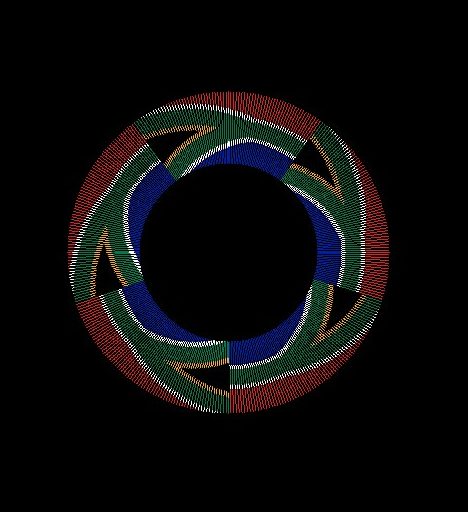
The solution: A PC-based emulator that takes Serial output from the poi via USB and turns it into an accurate emulation of what you would see while spinning:
So how do you do this? The hardware is simple, you need an Arduino Nano or D1 Mini (with cables) from Aliexpress – please consider buying with the links below as it really helps with my costs.
Arduino Nano (with or without cable):
Aliexpress: http://s.click.aliexpress.com/e/eRFcAt7a
OR:
D1 Mini:
Aliexpress: http://s.click.aliexpress.com/e/4Tb1vTn6
Micro USB cable for D1 Mini:
Aliexpress: http://s.click.aliexpress.com/e/ltrlczMG
Now you need some software. Arduino and Processing software. Because I got this emulator running a long time ago you will need Processing version 2.1. The Arduino IDE, however, will need to be the latest version.
Processing 2.1:
https://processing.org/download/
– scroll down to where it says Stable Releases and find version 2.2.1 for your platform (Windows/Mac/Linux)
Arduino IDE:
https://www.arduino.cc/en/Main/Software
– look for Download for your platform
Once you have those installed you need to get the software I put up on Github. You can use the download zip option and add the projects manually to Processing and Arduino sketchbooks, or if you have git installed simply git clone it. If you don’t have git, you should look it up.
Processing Emulator:
https://github.com/tomjuggler/FastLED_2_Processing
Arduino Pattern Code:
https://github.com/tomjuggler/FastLEDColourPaletteNanoEmulatorVersion
Upload the Arduino code to your microcontroller (if you are using the D1 mini there are some extra steps here which I won’t go into now – check out this tutorial here if you need to)
The Arduino code uses the FastLED Library, you may need to install that before it will compile.
If you bought the cheap Arduino Nano clone I linked please note that it will only work with the Tools -> Processor -> Old Bootloader option selected.
Open the Processing Sketch – by the way I only adapted this code, the original was for LED matrix emulation, which is really cool as well. Full credit to Marc Miller for this one.
– you need to choose your USB port here. Look for this line:
String portName = “/dev/ttyUSB0”;
– you need to change this to your own port. On Windows it will be COM1 or something like that. You could also try commenting the above line and uncommenting the one below:
//String portName = Serial.list()[0]; // <— *port number*
I have heard that this line may work to auto-detect the port needed on Windows at least. Obviously your microcontroller needs to be plugged in.
Start the Processing Sketch. If your port is correctly specified and Serial is connected the microcontroller should start sending colours over USB – now it’s time to have a look at the Arduino code and have fun making some changes. By the way, while your microcontroller is talking to Processing it can’t be programmed via serial, so stop the emulator if you want to upload.
Notes on the Arduino POV Sketch:
To create the patterns I am using FastLED library’s amazing ColorPalette feature, you can look it up in the FastLED examples (in Arduino IDE examples). There are so many ways to improve this code, please let me know if you have any improvements here, by commenting on github or just email tomjuggler at gmail dot com.
Next up: Stream images via Wifi to the D1 Mini emulator! Use C or Java to do it on PC or Android!!
Later on: Make your own low cost WiFi Streaming POV Poi!!! – Using the $2 ESP-01!
Sign up for our update alerts: