There seems to be a bit of confusion about the current status and difference between the SmartPoi and Magic Poi projects – so I thought I would break it down here.
SmartPoi
- a 10 year+ old project of mine – originally conceived of as trying to make a cheaper version of “Pixel Poi” by “Feeding the Fish*”. At the time they were extremely expensive to buy. See “history of SmartPoi” page.
- The latest STABLE version is the one I own – using a D1 mini and WS2812 LED strip (I also successfully used D1 Mini with APA102 strip) which is the one in the tutorial on my website. Programmed via Arduino IDE.
- There is an older version for ESP-01 and APA102 strip – not supported anymore, even Espressif don’t support the ESP-01 anymore!
- There is a newer version, using PlatformIO and ESP32 which I haven’t had a chance to fully test yet (except on a breadboard) – mentioned here. It is on a branch of the firmware GitHub – all of the control software for the D1 mini version works with this also.
- SmartPoi is basically finished – apart from updating the ESP32 version for stability.
- SmartPoi project has made me extremely happy, I lost count of how many people used my ideas to make their own poi – some sharing ideas back which helped me improve my design..
- If you live in Brasil you can actually buy a commercial version of SmartPoi, really well made (better than mine!) – as well as the most amazing LED Hula Hoops. Send them a message, hook it up!
*I actually met those guys in Brighton once – nice friendly, super talented people. I still hated them though – with envy of course.
Magic Poi
- New project built from scratch using all of the experience and ideas I got while building the SmartPoi project
- Difference is that Magic Poi has an Online Server where you can upload and store your images – as well as share with friends via a website (account sign-up required).
- Also, Magic Poi is built from the ground up using software best practises. Using PlatformIO and FreeRTOS on the dual core S3 version of ESP32, which allows for parallel processing – for example we can load images without interrupting the image display (keep spinning while more images get loaded in the background).
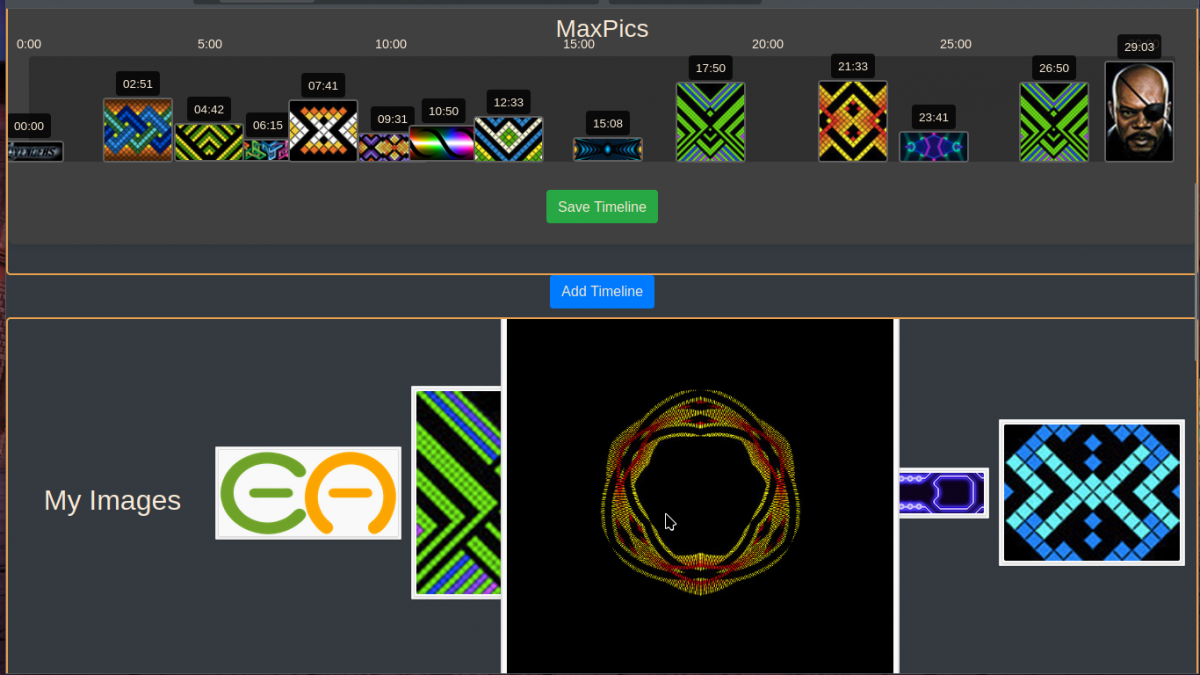
- Supports Timelines (timed image changes – switch images to music)
- Supports single image display (one image at a time)
- Has physical buttons to control poi. One click to download the Timeline you created (or one which was shared with you). One click to sync and start Timeline display. Button “menu” to choose images, multiple options.
- Also has a battery monitor built-in.
- Sync arbitrary number of poi via internet connection. Theoretically 100’s of poi can be controlled together in different locations across the globe.
- Most features from SmartPoi to be added as well (including Offline use, web app controls)
- Lots more features being added all the time.
- NOT currently available to the public!
We plan to sell Magic Poi
- Magic Poi is busy being developed by me (Tom Hastings) in partnership with my oldest friends who currently happen to have their own factory where they build a ton of cool stuff already – including electronics. I chose to go with EnterAction because I know and trust them fully and they have a track record of delivering quality products (and they are also poi spinners of course)
- We are currently on the third iteration of the circuit board for Magic Poi. This could very well be the final one – but if it isn’t we will be fixing it and ordering the fourth, and so on until it is 100% – see the proposed timeline here
- SmartPoi ESP32 version is fully compatible with Magic Poi hardware, by the way, and comes with OTA uploading, so if you tried SmartPoi and like it, you will be able to run the exact same Open Source code on Magic Poi – and upload without even plugging into USB. (of course I hope you will like the new Magic Poi firmware better)
The Patreon – why?
I set up a Patreon mainly because a few of you lovely people mentioned that you wanted to have a way to support me financially in developing the software. Up until a few months ago the only income I derived from my SmartPoi and other projects was affiliate links – full disclosure, I made R800 over 4 years. That is apart from the direct benefit of having and using my own SmartPoi in my shows.
Since the costs were increasing as we got closer to actual product launch I set up the Patreon. Right now there are 6 paid members who kindly give me money every month. It almost covers the full cost of 1. Server hosting and 2. (the big one) DeepSeek credits for AI assisted development. Development speed has increased exponentially since I started using Aider and improving my AI enhanced development skills.
Until we start selling Magic Poi I will keep diligently sharing updates and exclusive access to my Patreon supporters.
Any day now
- Magic Poi will go on sale
- I hope you will buy a set – the first “Alpha” version will be as cheap as we can make it I promise. Especially for Patreon paid subscribers, you guys helped me and I plan on waiving the cost for services such as server costs and development to give you guys a decent discount at launch.
- Magic Poi firmware will be available to owners of the poi upon purchase. I am a firm believer in Open Source, you will have access to modify the code running on your own equipment if you want.
- Magic Poi online account subscription will be included in the price of purchase. Poi will 100% work without any online subscription or internet connection.
- I hope to get to a point where we sell enough poi to pay for my development time and of course the AI and Server costs, so I won’t need Patreon anymore to break even.
- We have a long list of products we want to develop – all in the Poi/Juggling/Flow arts space. Magic Poi is just the first*.
- If you haven’t already, join me on Patreon (until launch day at least). It costs nothing to join and you get the updates first (plus some exclusive content and discount if you pay the minimum $3 per month or more)
*I am very proud of my upgraded version of K8 IR controlled commercial juggling equipment – made my own version of the firmware and have some ideas to improve this for single colour poi, juggling balls in the future..