Upgrading K8 Prophecy club with new battery and firmware

My K8 Prophecy clubs have reached the end of their tether. After 8 years of use! First of all, many thanks to K8Malabares for their excellent equipment. Most smartphones won’t last that long (except for my Samsung Galaxy S2, which still works). If you need juggling equipment you can’t go wrong with K8. I have some of their non-LED equipment as well and it’s just as good.

Upgrade

About six years ago I did an experiment – to see if I could emulate the K8 IR code on an Attiny85 chip. I knew they used that chip, or possibly the Attiny45, because one of my clubs was faulty and I opened it up to have a look – K8 sent a replacement, by the way, talk about great customer service!

Now that my balls and clubs are not working anymore, due to the battery reaching end of life, it’s the perfect time to test out my new code. Luckily K8 didn’t solder their chips, instead opting for a convenient chip socket for easy replacement! I made some updates to the code, adding new functionality and colours. (K8 have also done an update since I bought my equipment) The most important, for me, was adding a timeline record and playback. This means that I can record the timed colour changes for my entire show into the chip via IR remote, and play it back (in time with the music) by pressing a single button. This is similar to how Aerotech Ultimates used to work.

You can check out the code for Attiny85 here.

Batteries

The batteries were the main thing. K8 use lithium batteries with 250mah power. I found some batteries online with a capacity of 600mah which I thought I could make fit (see below for details – not quite, but I made it work). I also bought a cool new charger for the new batteries.

The procedure

For anyone who wants to try and do this, I am posting some tips and photo’s.

1. Taking apart the club

Pull off the tape from the center, then pull out the staples:

Take off the knob and top bumper:

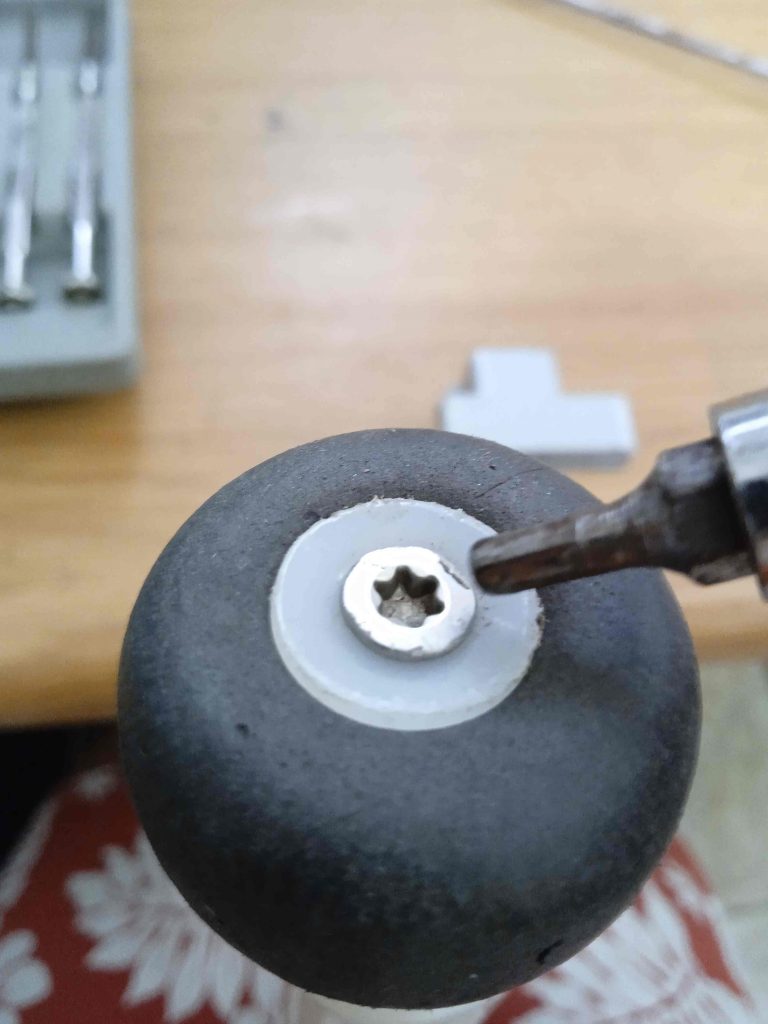
Pull off the plastic around the handle, then unscrew the plastic spacer (needs an allen key)

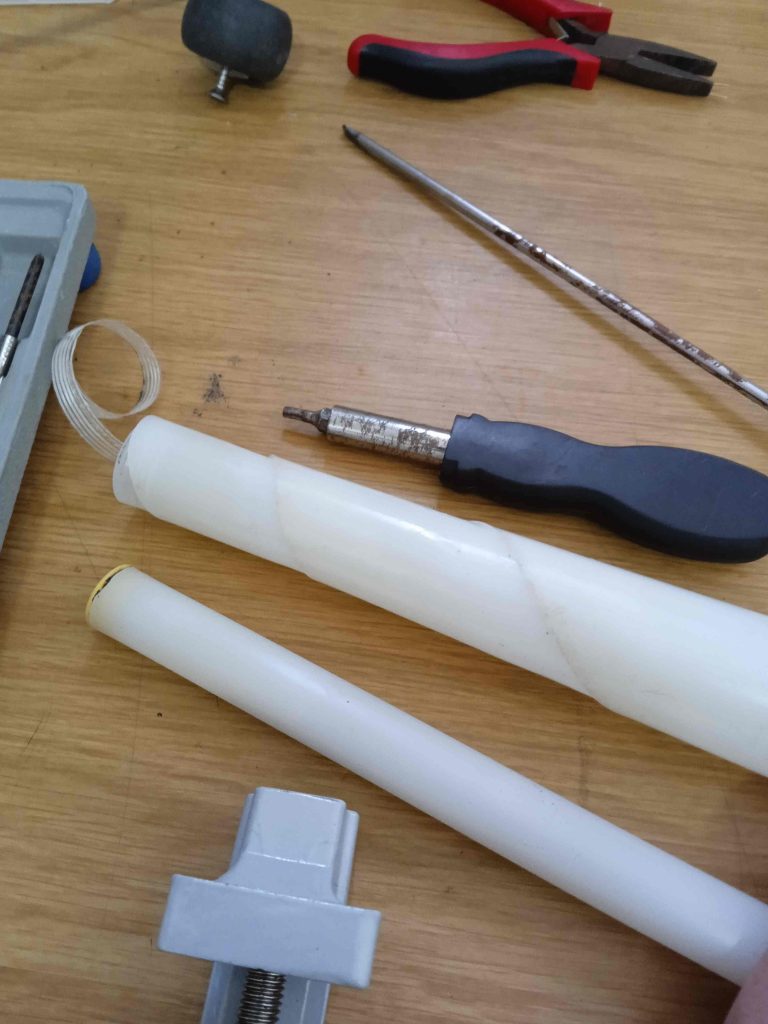
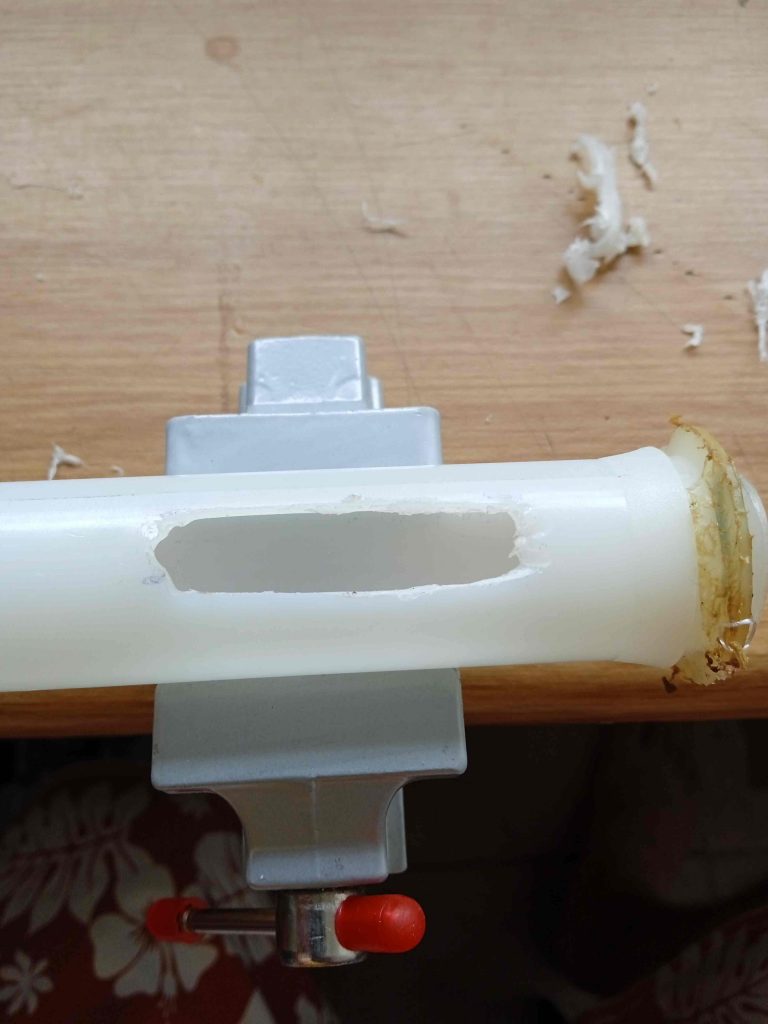
The next part is really sensitive – make holes in the top of the bulb cover to let the inside pipe come out. Get it out by pushing from the bottom – I also shoved a dowel inside and pushed upwards. If you use too much force this plastic pipe could bend, so be careful.

Now pull out some more screws holding the thicker top piece of the inside pipe on, and pull the spacer out to let the electronics out.

The bottom thin pipe should come off easily, leaving the bare circuit board.

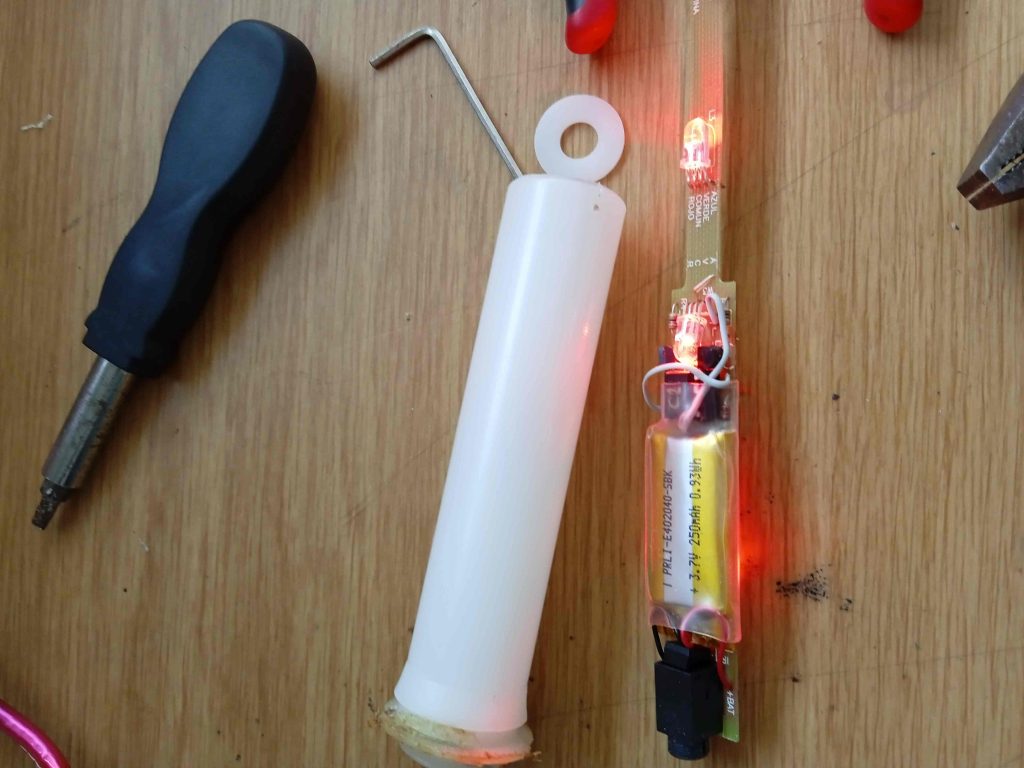
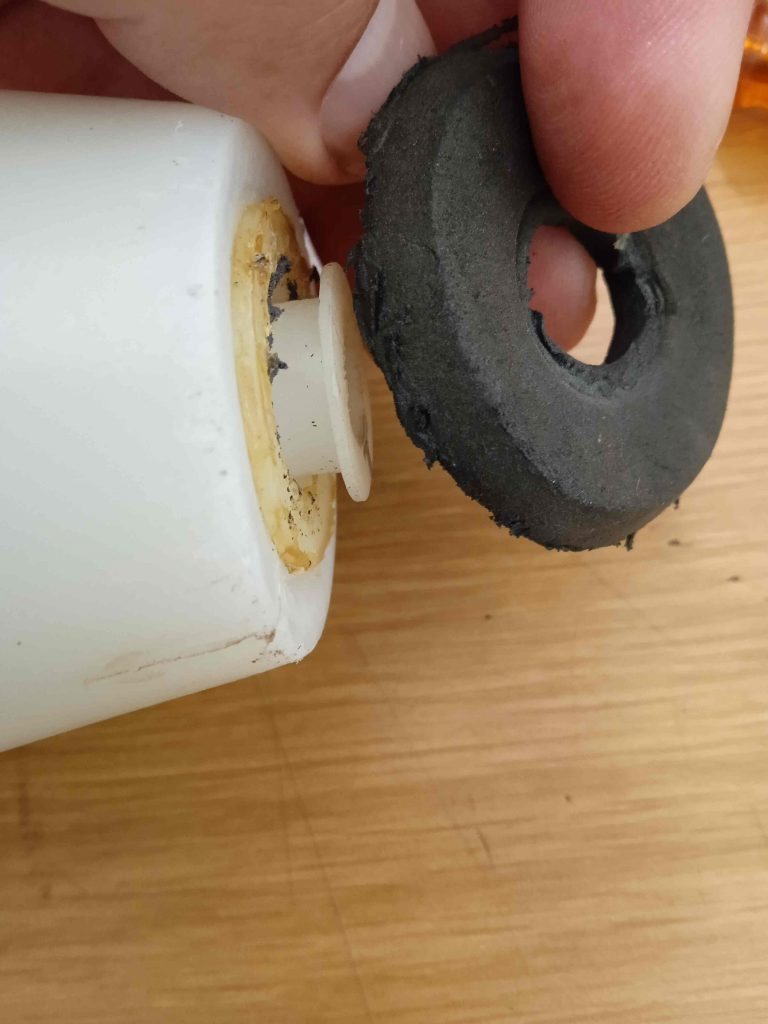
Now cut off the insulating cover, exposing the battery. See how fat it is!

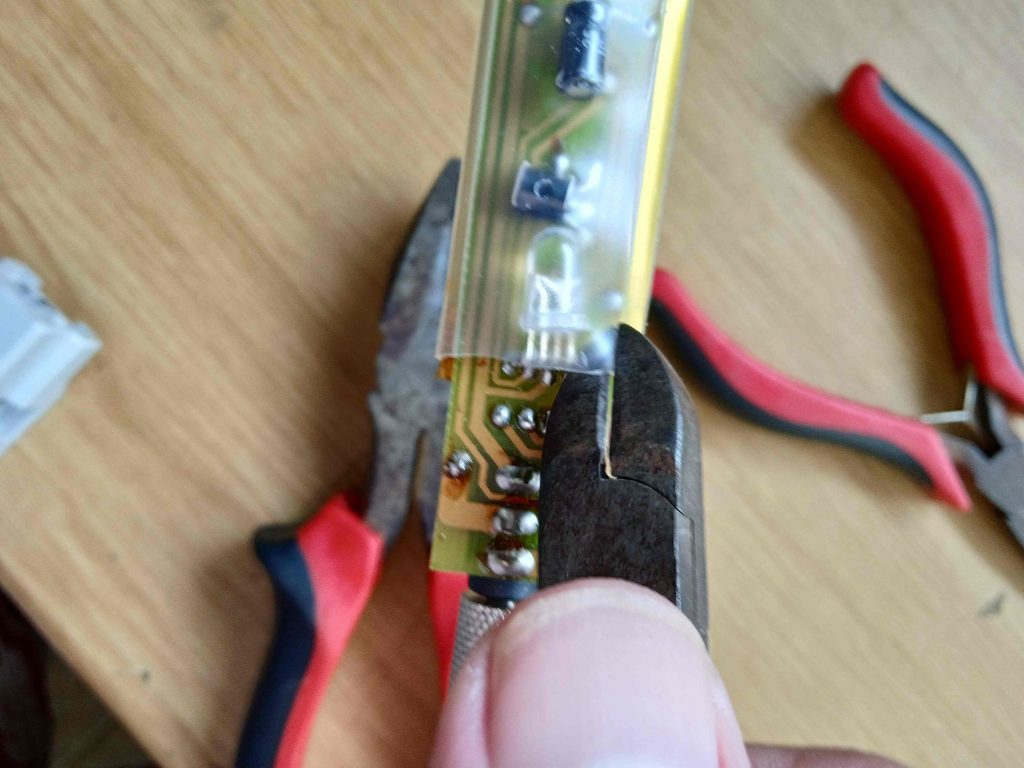
Pull the battery away from the board (carefully) and cut the two wires as close as possible to the battery – we need those!

The new battery ready for placement. Also, my newly programmed chip in place (old one from K8 labelled C2.

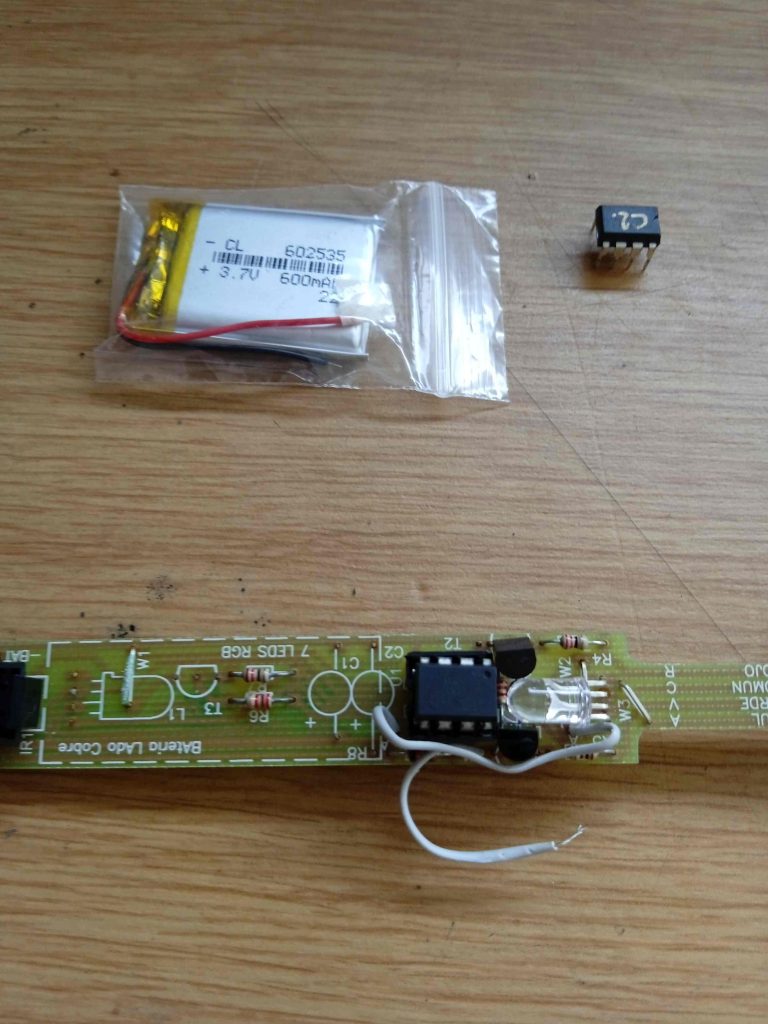
Now comes the hard part. Making space for the new battery. I had to cut into the larger diameter tube on both sides so that this could fit. I actually bought a Dremel to do this job.

Now put the circuit back into the top pipe, and find the battery wires. Then solder the battery on – finishing with insulation. The battery should fit with only a little bit sticking out on both sides of the pipe.

I used clear tape to stick the battery in – it was already pretty snug as the holes were just right.

Putting it back together

Just like taking it apart, only in reverse (and much easier)

Put the longer circuit cover tube back in and line up the holes (with the spacer), then put the screws back in. This works fine with just pliers, just twist left and right for these, while pushing in firmly:

Now the inside tube goes back into the top of the bulb – it just snaps in easily (how hard was that to take out, though, whoah!)

After putting the top bumper back, the middle spacer goes on. I forgot to mention, that doesn’t come off without removing a plastic screw cover (yellow, bottom of thin tube) so keep that in mind if you haven’t taken this apart yet.

Finally it’s time for the wrapped plastic handle – I didn’t put the staples back, you are welcome to try and do that..

Add some tape to keep everything together, screw on the knob and your club is “as-new” again.

Just a quick tip, I noticed that there is a bit of wear where the circuit goes from thin to thick (you will see what I mean – the long bit with all of the LED’s. Some of my clubs had non-working colours due to this, and I had to bridge the gaps with wires.

Let me know if you have K8 clubs and are interested in upgrading yours, I am happy to answer any questions.

Upgrading DigitalOcean Ubuntu Droplet from 20.04 to 22.04

The problem

Recently I found out that PHP 7.4 is going to reach End Of Life at the end of November, 2022. This was an unfortunate situation considering I have several websites running on a couple of Ubuntu Server 20.04 DigitalOcean Droplets. It’s unfortunate because I found out that the only supported version of PHP for Ubuntu Server 20.04 is the soon to be obsolete version 7.4.

The Solution

There are two ways to do this – upgrade PHP via a PPA on Ubuntu 20.04, or upgrade Ubuntu to 22.04. I already upgraded my desktop without any issues, so I went with the latter option.

I will outline the procedure I used below. It went without a hitch, apart from having to do it twice due to a broken WordPress plug-in. I am embarrassed to admit that the plug-in was my own creation (in my defense I am not a PHP developer)

  1. Check all WordPress plug-ins for compatibility with PHP 8.1
  2. Create a snapshot of the Droplet
  3. Use the snapshot to create a new Droplet with the same specs as the old one.
  4. Power on the new server, login and proceed to upgrade to 22.04. I used screen to keep the upgrade process alive in case of ssh dropout.
  5. Once this process is completed, you still need to switch the version of PHP that Apache is using (I’m not sure if this is necessary for Nginx). It was something like:
    sudo a2dismod php7.4
    sudo a2enmod php8.1
    sudo service apache2 restart
  6. In the control panel, switch over your website’s DNS to point to the new domain. Depending on TTL this can take a while to propagate – I did mine one at a time and checked them with the ping command.
    ping circusscientist.com – returns the IP address
  7. If anything went wrong, it’s easy to switch back to the old 20.04, so I left that running for a few days. Worpress.org has some great articles here and here which I sometimes use to help with troubleshooting
  8. Finally, switch off the old 20.04 server and remember to delete it (keep the snapshot, though, just in case!)

Using maps and geocoding to follow the money

I do shows all over Durban and surrounds – but where exactly? And which areas are the most lucrative? To work that out I made an interactive Desktop app using Processing and the Modest Maps library. To get the points on the map I used Google Geocoding api.

Map details page

How it works

The process is quite simple, I create a csv file from our records, with the customer address and total invoice amount in columns (as well as blank latitude and longitude columns).

I created a start screen to choose which csv to use for the visualisation, with an option to fill in the locations using Google geocoding* api.

*geocoding is taking an address and turning it into location co-ordinates.

Menu page

Once the geocoding is done, there are two options, map or details. The details page is basically the same but the points are larger or smaller depending on the amount.

Google geocoding is not completely accurate, so there is a bit of csv editing still to be done – some addresses may appear in different countries for example. Luckily fixing this manually is quite straightforward, you just find the correct location on google maps and then copy the “lat” and “lon” parts of the url from the browser address bar (just after the @ symbol).

The “Modest Maps” library for Processing has many options for tiling – I switched to the satellite view for the screenshots above, to avoid giving away sensitive information. Usually I use a street map view of course.

Purpose and functionality

The purpose of this app is mainly to see where all of our customers are booking us. This information is useful for marketing. When the program is running, two boxes can be drawn around areas on the map, and the text at the bottom compares the total invoice amount within those boxes. The map can be zoomed and panned, and a total for the whole page (with percentage) is shown for reference.

Comparing two zones

More possibilities

Since the pandemic is effectively over and we are back to full strength in terms of bookings, these statistics are now valuable again for my entertainment business. I plan on extending this simple app with more statistical visualisations – perhaps a colour map of distance from my house, and also pairing it with a database and more fields, like dates and type of booking. I could also automate the data entry, although that is rather trivial with a bit of spreadsheet manipulation, and I only really look at this a few times per year.